ABBYY FineReader Amazement and Disappointment

I’ve spent much of the past three days giving myself a crash-course in ABBYY FineReader on my (Windows) work laptop, and have been really impressed with its speed, accuracy, and ability to greatly streamline the process of making scanned PDFs searchable and accessible. After testing with the demo,I ended up getting approval to purchase a license for work, and I’m looking forward to giving it a lot of use – oddly, this seemingly tedious work of processing PDFs of scanned academic articles to produce good quality PDF/UA accessible PDFs (or Word docs, or other formats) is the kind of task that my geeky self really gets into.

Since I’m also working a lot with PDFs of old scanned documents for the Norwescon historical archives project, tonight after getting home I downloaded the trial of the Mac version, fully intending to buy a copy for myself.

I’m glad I tried the trial before buying.

It’s a much nicer UI on the Mac than on Windows (no surprise there), and what it does, it does well. Unfortunately, it does quite a bit less — most notably, it’s missing the part of the Windows version that I’ve spent the most time in: the OCR Editor.

On Windows, after doing an OCR scan, you can go through all the recognized text, correct any OCR errors, adjust the formatting of the OCR’d text, even to the point of using styles to designate headers so that the final output has the proper tagging for accessible navigation. (Yes, it still takes a little work in Acrobat to really fine-tune things, but ABBYY makes the entire process much easier, faster, and far more accurate than Acrobat’s rather sad excuse for OCR processing.)

On the Mac, while you can do a lot to set up what gets OCRd (designating areas to process or ignore, marking areas as text or graphic, etc.), there’s no way to check the results or do any other post-processing. All you can do is export the file. And while ABBYY’s OCR processing is extremely impressive, it’s still not perfect, especially (as is expected) with older documents with lower quality scan images. The missing OCR Editor capability is a major bummer, and I’m much less likely to be tossing them any of my own money after all.

And most distressingly, this missing feature was called out in a review of the software by PC Magazine…nearly 10 years ago, when ABBYY first released a Mac version of the FineReader software. If it’s been 10 years and this major feature still isn’t there? My guess — though I’d love to be proven wrong — is that it’s simply not going to happen.

Pity, that.

In Search of a MarsEdit Equivalent for iOS

A question for macOS WordPress bloggers who use Red Sweater Software’s excellent MarsEdit: What’s your go-to mobile iOS blogging tool?

MarsEdit is a great example of a “do one thing and do it really well” piece of software, and I’ve yet to find anything equivalent for mobile blogging. I just want exactly what MarsEdit gives me: A list of my most recent posts and pages, a solid plain-text Markdown editor, and access to all the standard WordPress fields and features.

Every other editor I’ve tried either doesn’t do one or more of those things or is otherwise not quite right in some way. Ulysses was the closest and I tried it for a while, but while it’s a great editor, it doesn’t pull a list of posts and pages from the blog, just works with whatever’s local or in its own cloud sync or Dropbox or whatever, and last time I used it, had a bug where alt text wasn’t getting applied to images correctly.

(The WordPress native app drives me up the wall. I don’t want block editing. I want text and Markdown.)

Really, what I want is an iOS version of MarsEdit. But failing that: any recommendations?

Blog This Shortcut for iOS or macOS

Blog This shortcut button image I’ve been working for the past few days on constructing a Shortcut to use for quickly sending a link and block of text to whatever blogging software I’m using on whichever device I’m on at the moment. As of today, I’ve hit a point where it does everything I wanted it to when I started playing, so I’m designating this an official “version one” release (for posterity’s sake, I suppose I can refer to the prior two versions as the alpha and beta releases).

The Shortcut is now cross-platform, with many thanks to Jason Snell for giving me exactly the final pieces I needed.

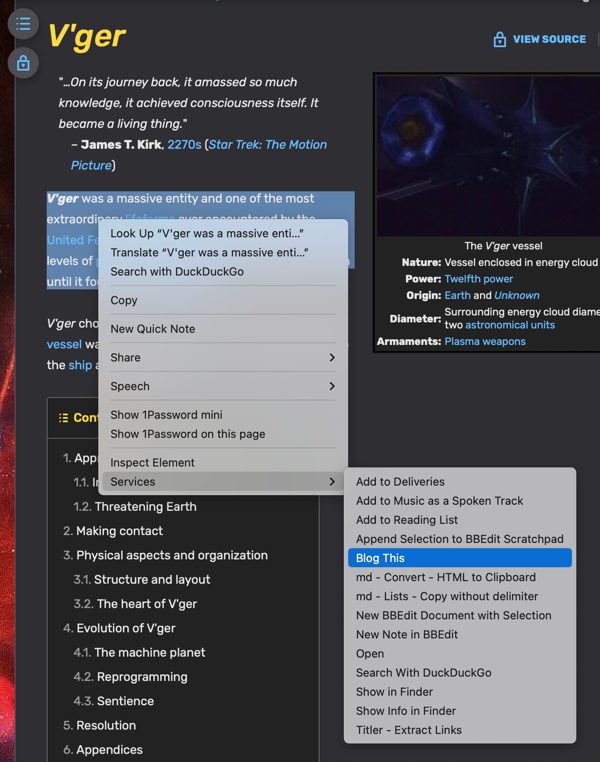
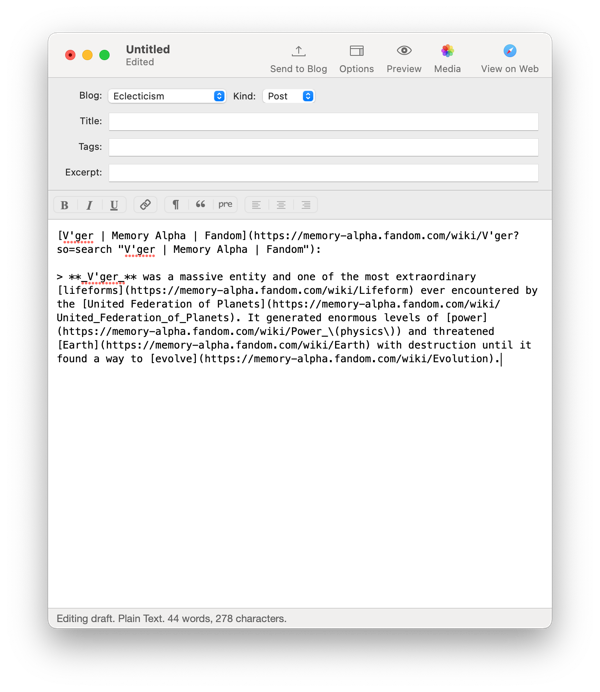
Selecting some text on a webpage and then using the Share Sheet on iOS or the Services menu on macOS will grab the webpage link and the selected text, convert it to Markdown format, convert any relative URLs in the selected text to absolute URLs, and then place the final text into a new Ulysses sheet on iOS or MarsEdit post on macOS, all ready for any final edits before publishing to your blog.

If this shortcut might be of use to you, either as-is or with some modifications for your particular needs, download, tweak if necessary, use, and (hopefully) enjoy!

Blog This service menu item on macOS MarsEdit window with shortcut output text

Vinegar:

YouTube5 was a Safari extension back when Flash was still a thing and hated by everyone. It replaced the YouTube player (written in Flash) with an HTML <video> tag.

And now the YouTube player situation has gotten bad enough that we need another extension to fix it. That’s where Vinegar comes in. Vinegar also replaces the YouTube player (written in who-knows-what) with a minimal HTML <video> tag.

Unclack for macOS: Unclack is the small but mighty Mac utility that mutes your microphone while you type. No more getting called out for clacking your way through a Zoom meeting on your clicky keyboard!

DVD/Blu-Ray conversion with text soft subtitles on macOS (2021 Update)

Saved here for my own reference, and possibly others’ if they should stumble across it: the easiest workflow I’ve found yet for converting DVDs or Blu-Rays for personal use on macOS, including conversion of subtitles from either Closed Captions, VobSub (DVD), or PGS (Blu-Ray) format to text-based .srt files suitable for use as soft subtitles, either as a sidecar file or included in the final movie file. (Updated from my original 2015 post to account for software and process changes).

Rip the System Disk

DVD Subtitle Workflow 1

Use MakeMKV to rip the DVD or BluRay disc to .mkv files.

Since I’m archiving special features as well as the main program, I simply rip every title on the disk longer than 30 seconds, and then trash any that I don’t need (such as menus, studio promos, etc.). I do check to make sure that all English-language audio or subtitle tracks are selected; usually they are by default, but I’ve seen rare situations where they need to be manually checked.

Once all the .mkv files have been created, I go through and rename each one to be something more descriptive than title_t03.mkv.

Extract the Subtitles

DVD Subtitle Workflow 2

For each .mkv file, use Subler to extract the subtitles. This takes two passes through Subler to complete.

  1. First, drag the .mkv file onto Subler, and deselect everything but the subtitle track(s) that you want to convert.

    Subler Import

    Subler’s “Info” column will describe the subtitles as either VobSub, PGS, or Text. I used to convert them all so that I could choose which gave me the best results; now, I’ll ignore VobSub/PGS if Text is available (but it’s less common).

    VobSub or PGS: These are the most common subtitle types. They’re actually a series of image files (.png, I think) with attached timing information that media players layer over the video stream. The advantage is that font, color, size, placement, and even fancier graphics (sometimes used for “pop up trivia” style tracks) are all at the creator’s discretion; the disadvantage is that because they’re image files, the text has to be extracted through an OCR (optical character recognition) process that frequently leads to typos and garbage characters.

    Text: These are Closed Caption files. I’m not sure how they’re stored on the physical disks, but current versions of MakeMKV convert them to text during the process of ripping to .mkv. I’ve generally found these to have far fewer typos and oddities than OCR’d VobSub or PGS subtitles. However, it’s often a toss-up as to whether the captions are presented using standard captalization or in ALL CAPITALS, and they use varying numbers of space characters to manually place text centered or off-centered. Depending on how picky you are about the output, these factors can affect how much post-processing is needed.

    After choosing the subtitle tracks and clicking “Add” to create a new Subler document, you can either save the Subler document (fine if you’re only doing a single file) or use File > Send to Queue to create a batch queue (best if you’re converting multiple files). When the file is saved or the queue is run and all queued files are saved, Subler will either extract the Closed Caption text or OCR the subtitle images and output a small .mp4 file.

  2. Second run; drag the new .mp4 file back onto Subler, click on the subtitle track(s), and choose File > Export… to save the .srt file(s). The tiny .mp4 file can then be deleted.

    Subler Export

Correct the Subtitles

DVD Subtitle Workflow 3

As noted above, the exported .srt file(s) are virtually guaranteed to have some oddities; how many and how intrusive they are depends on the source. Caption files are often in ALL CAPS and have weird spacing used to force the text to a desired on-screen position. Subtitle files will contain OCR errors, but BluRay (PGS) subs seem to come out better than DVD (VobSub) subs (likely due to the higher resolution of the format giving better quality text for the OCR process to scan). Accuracy is also affected by the chosen font and whether or not italics were used.

For correction, I use a couple methods.

  1. For a quick-and-dirty “good enough most of the time” run, I use BBEdit (but just about any other text editor would work) to do a quick spellcheck, identifying common errors and using search-and-replace to fix them in batches.

    I’ve actually set up a few scripts to automate the most common search-and-replace steps to help with this process.

  2. For a real quality fix–or if I have the time to create subtitles from scratch for a file that doesn’t have any–I use Subtitle Edit Pro to go through line-by-line, comparing the text to the original audio, adding italics when appropriate, and so on. (I used to recommend Aegisub, but that project appears to have been abandoned a few years back. There doesn’t seem to be a big market for subtitle editing on macOS; Subtitle Edit Pro is the best option I’ve found since Aegisub stopped working consistently.)

Of course, these two processes can be combined, done at different times, or skipped entirely; if I don’t have time or energy to do the error correction, I can always go back and use Subler to extract the .srt files for cleanup later.

Embed the Subtitles

DVD Subtitle Workflow 4

Use HandBrake to re-encode and convert the .mkv file (which at this point will be fairly large, straight off the source media) to a smaller .m4v file. Include the subtitle file by choosing Tracks > Add External Subtitles Track… in HandBrake’s Subtitles tab.

Handbrake Subtitles

Or, if you’re already working with an .m4v file, you can use Subler to add .srt files to into the .m4v: Drag the .m4v file from HandBrake on to Subler, drag the .srt file(s) into the window that opens, and then save the file.

Finito!

And that’s it. Now, you should have a .m4v file with embedded text-based soft subtitles.

TWOK Subtitles Example

You can also just store the .srt file(s) in the same directory and with the same name as the .m4v file for apps that don’t read embedded .srt files but will read sidecar files.